Cherry Scones
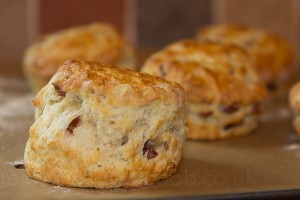
For a while now I’ve been looking for the perfect scone recipe. For me, a scone should be light, well risen (but not toweringly tall), slightly crumbly inside, nicely browned and above all taste delicious!
It shouldn’t be to “cakey” inside and it doesn’t have to be perfectly formed with dead straight sides. Scones should be rustic and slightly misshapen, they should look like they were made by hand, not in a factory.
In my quest for the perfect scone, I asked my friends on Twitter, Facebook and CIX for their recipes, tips and tricks. I searched the internet and looked through all my baking books, comparing all the different recipes. I combined everything together and baked several batches, trying different techniques and oven temperatures. I’m not saying the recipe below is perfect, but they are the best scones I’ve made so far!
I’ve found that the key to good scones is more to do with how you make them rather than the ingredients.
The recipe below will make about 5 good sized scones. I found a lot of recipes said they would make 8 or even 10 scones but when I came to roll them out I never got anywhere near those quantities unless I made them really thin. If you want to make more, simply double the quantities.
Ingredients for the Scones (Makes about 5):
- 225g Self raising flour
- 50g Butter (softened)
- 30g Castor sugar
- 1 Egg
- 1tsp Baking Powder
- Milk (preferably full fat)
- 75g Glace Cherries
To Make the scones:
- In a large mixing bowl, sift the flour and the baking powder.
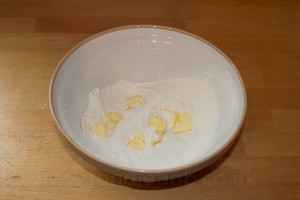
- Cut the butter into small cubes and add to the bowl
- Using the tips of your fingers, rub the butter into the flour until the mixture resembles breadcrumbs. While you are rubbing in, lift your hands up to introduce as much air as possible
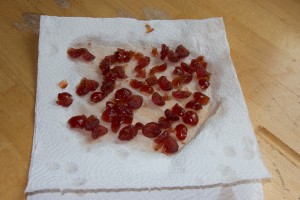
- Cut the glace cherries in half using scissors and put them into a sieve.
- Rinse the cherries under warm water and then turn them out onto some kitchen roll and pat dry.
- Break the egg into a measuring jug and then add the milk to make 150ml of liquid. Beat this mixture with a fork
- Get a glass, and put aside 2tbsp of the egg/milk mixture for use later.
- Next, add the sugar to the mixture making sure there are no big lumps of sugar.
- Pour the egg/milk mixture into the mixing bowl
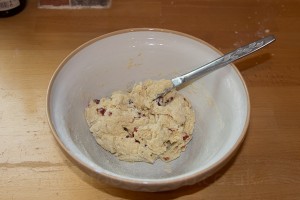
- Using a knife, gently mix the ingredients together a little bit
- Add the cherries and continue to gently mix with the knife
- After a short while, everything should start to combine and start leaving the sides of the bowl clean. As soon as everything has come together into a ball STOP mixing. You do not want to over mix the mixture
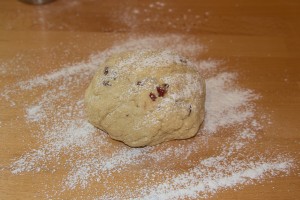
- Lightly flour the worktop (or wherever you are going to roll out the scones). You should also lightly flour your hands as the mixture is fairly sticky!
- Take the mixture from the bowl, lightly press it into a ball using your hands and place it on the floured surface.
- Press the top down with your hands to flatten it slightly and then shape the sides lightly to make a round shape.
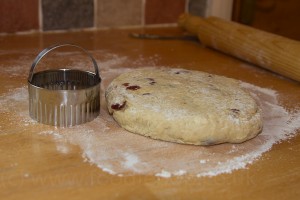
- Lightly flour the top and the, using a rolling pin, start to roll out the mixture. The key is to press lightly and evenly. Roll once, away from you and then back. Spin the dough 90 degrees, roll once again
- Keep LIGHTLY rolling until the dough is about 2.5cm high.
- Lift the dough slightly off the worktop and place back down, this relaxes the dough into it’s natural shape.
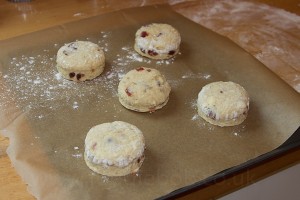
- Get a baking tray and place a piece of baking parchment on top.
- Take a 6.5cm wide cutter, and dip it into some flour (this stops it sticking to the dough)
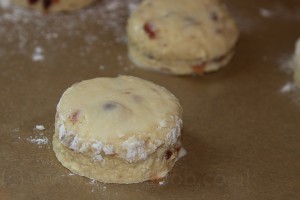
- Hold the cutter on top of the dough and then quickly press down hard. DO NOT TWIST! Pull the cutter up and place the scone onto the baking tray.
- Repeat this for each scone, remembering to dip the cutter in flour in-between each scone.
- Once you have cut out as many scones as you can, gently combine the left over dough, roll it out and cut out again. For the last bits of dough I usually just roll it into a ball in my hands a squash it down a bit.
- Heat oven to 220C or 200C for a fan oven
- While the oven is heating up, leave the scones on the side to rest for about 10 minutes. This allows the dough to relax.
- Once the oven is hot, use a pastry brush to brush the tops of the scones with the egg/milk mixture you put to one side
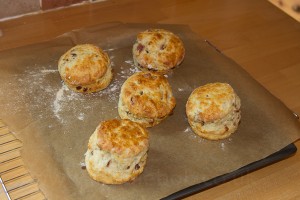
- Bake the scones in the oven for about 12 minutes until they are a nice golden brown
- Once removed from the oven, put the scones on a cooling rack to cool.
The dough is now ready for cutting out. This is probably the most important part of the recipe.
In a case of perfect timing, while I was making these scones I read on Twitter that this month’s Tea Time Treat challenge by LavenderandLovage and What Kate Baked was scones! So after you have made these scones, why not pop along and have a look at some more lovely scone recipes.


March 19th, 2012 at 4:52 pm
Those look AMAZING and they rose so high too….I am a BIG lover of cherry scones, and I must try this recipe, as it looks uncomplicated and the results speak for themselves! Thanks for entering Tea Time Treats Bob!
Karen
March 20th, 2012 at 9:59 am
These look like incredibly great scones! I have never tried cherry, but really want to now!
March 20th, 2012 at 11:01 am
Thanks James. I’ve just had a look at your blog and I’m looking forward to more instalments of your River Cottage Bread Journey.
April 2nd, 2012 at 10:58 am
[…] pleased to see that my good twitter and Yorkshire friend, Foodie Bob baked a fabulous batch of Cherry Scones for the next entry! Bob says that for a while now he’s been looking for the perfect scone […]
April 2nd, 2012 at 8:59 pm
I’m always looking for the perfect scone too. I have always enjoyed cherry scones, I must try your recipe.
August 4th, 2012 at 9:37 pm
I made these tonight using fresh cherries and they turned out light, buttery and delicious. Great post and great recipe.
August 17th, 2012 at 10:02 am
Thanks Nikki! It’s always great to hear from people who try my recipes!
I like your idea about using fresh cherries, may have to try that next time.
October 30th, 2012 at 5:58 pm
Hi, I made these scones using this recipe and they were absolutely lovely Light texture and plenty of flavour, my 2 year old loved making them and mostly eating them, so did my husband!!! Thank you for this recipe I will be using this from now on
October 31st, 2012 at 3:07 pm
Thanks Kelly. For a twist, you can always substitute the cherries for chocolate chips…
October 23rd, 2014 at 2:17 pm
A very clear recipe, easy to follow, I’ve made the cherry scones three times now. I have tweaked things a little – added a pinch of salt and upped the cherries by 25g. I’ll try your suggestion of chocolate chips next time. Would like more suggestions for variations on your basic scones’ recipe.
January 25th, 2015 at 7:19 pm
This recipe is awesome! Thank you so much, my quest for amazing yummy scones has finally been fulfilled. You rock 😀
August 12th, 2015 at 2:01 pm
Wow made a batch and I’m in heaven ! Realised where I was going wrong before I’ve manhandled them too long